How To Lining a Loaf Pan?
Lining a loaf pan is a crucial step in baking that ensures your bread or cake releases effortlessly from the pan, maintaining its perfect shape. Whether you’re baking banana bread, a classic loaf of sourdough or a rich pound cake, knowing the best techniques to line your loaf pan can make all the difference in achieving professional-quality results.
In this blog post, we’ll delve into the topic of how to line a loaf pan and provide you with tips and tricks for achieving that perfect bake every time.
From classic methods to alternative ideas, we’ve got you covered on finding the best way to line your loaf pan for baking success.
Lining Loaf Pan: Step by Step Guide
Materials needed for lining a loaf pan
- Parchment Paper: A versatile and non-stick option that makes removing baked goods from the pan easy and mess-free.
- Cooking Spray: Provides a quick and convenient way to grease the pan, helping to prevent sticking.
- Butter or Oil: Traditional methods that can be used to coat the pan, creating a slick surface for easy release.
- Scissors: Essential for cutting parchment paper to fit the dimensions of your loaf pan accurately.
- Pastry Brush: Useful for applying butter or oil evenly across the surface of the pan.
- Flour: Can be used in combination with butter or oil to create a non-stick barrier between the pan and batter.
- Aluminum Foil: An alternative to parchment paper, aluminum foil can also be used to line a loaf pan for easy removal of baked goods.
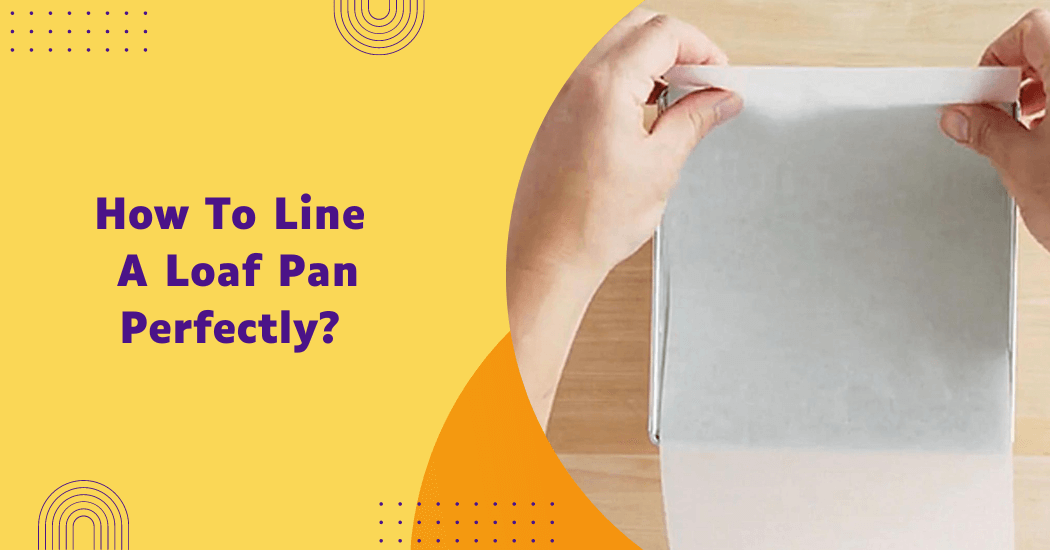
Steps To Lining Loaf Pan With Parchment Paper
- Measure and Cut: Start by measuring the length and width of your loaf pan. Cut a piece of parchment paper that is long enough to cover the bottom of the pan, with a bit of overhang on the sides to make lifting the baked goods out easier.
- Grease the Pan: Lightly grease the bottom and sides of the loaf pan with butter, oil or cooking spray. This will help the parchment paper adhere to the pan and stay in place.
- Fit the Parchment Paper: Place the cut piece of parchment paper along the length of the pan, pressing it into place so it adheres to the greased surface. Ensure the parchment is snug against the bottom and corners of the pan.
- Trim Excess Paper: If there is an excessive overhang that could be cumbersome, use scissors to trim the parchment paper so that it extends just an inch or two above the sides of the pan. This will give you handles to lift the baked goods out once done.
- Grease the Parchment Paper (Optional): For an extra non-stick surface, you can lightly grease the top of the parchment paper with butter or oil. This step is optional but can be helpful, especially for stickier batters.
- Add Batter and Bake: Pour your batter into the prepared loaf pan and smooth it out evenly. Bake according to your recipe’s instructions.
- Remove from pan: Once baked, allow the loaf to cool for a few minutes before using the overhang of parchment paper to lift it out of the pan easily.
Tips for a perfectly lined loaf pan
- Use High-Quality Parchment Paper: Investing in good-quality parchment paper ensures that it won’t tear or break easily, providing a reliable non-stick surface.
- Double-Check Measurements: Always double-check your pan’s dimensions before cutting the parchment paper to ensure a perfect fit. An accurately measured piece will minimize adjustments during placement.
- Prevent Curling: To prevent parchment paper from curling, you can crumple it up into a ball and then flatten it out before placing it into the pan. This makes it more pliable and easier to handle.
- Butter Under Parchment: Applying a small amount of butter or oil directly to the pan before placing the parchment paper helps it stay in place, reducing shifts and slides as you pour in the batter.
- Corner Cuts: For a neater fit, make small diagonal cuts at each corner of the parchment paper. This allows the paper to overlap slightly, ensuring a smooth surface without bunching.
- Extra Spritz of Non-Stick Spray: A light spritz of non-stick cooking spray on top of the parchment paper can provide an additional layer of protection, especially useful for sticky recipes.
- Reusable Options: Consider reusable parchment liners, which are eco-friendly and can be washed and reused multiple times. These are often pre-cut to fit standard loaf pan sizes, making them a convenient option.
- Keep it Tight: Ensure the parchment paper is tight against the pan sides and corners to avoid the batter seeping under and causing sticking issues.
- Aluminum Foil Assist: For heavier batters, lining the pan with aluminum foil underneath the parchment paper can provide added stability and support.
By following these tips, you’ll create a well-lined loaf pan that contributes to a seamless baking process, ensuring your baked goods come out perfectly shaped and easy to release every time.
Common mistakes to avoid when lining a loaf pan
- Using the Wrong Size: Using a parchment paper that is too small or large for your pan can cause it to shift or bunch up, leading to uneven baking and sticking.
- Not Greasing the Pan First: Neglecting to grease the pan before adding the parchment paper can result in shifting and sliding, causing an uneven lining and potential sticking issues.
- Placing Parchment Paper Upside Down: Parchment paper has two sides: one with a smooth surface and one with a slightly rough surface. Placing it upside down will affect its non-stick properties.
- Bunched Corners: Not trimming or folding the corners of the parchment paper properly can lead to bunched-up edges that can affect the shape and texture of your baked goods.
- Unnecessary Overhang: Leaving too much overhang on the parchment paper can make it difficult to remove the loaf from the pan. It can also lead to uneven baking if the sides of the paper are touching the oven walls.
- Not Greasing Parchment Paper (for stickier recipes): While lightly greasing parchment paper is optional, stickier batters such as those with honey or molasses need to prevent sticking.
- Using Dull Scissors: Using dull scissors to cut parchment paper can result in tears and jagged edges, making it challenging to fit properly into a loaf pan.
Special Techniques For Different Recipes
| Recipe Type | Special Technique |
|---|---|
| Bread | Add a damp kitchen towel over the loaf during the first half of baking to create a steamed environment. This ensures a crisp crust. |
| Brownies | Cut the parchment paper into a sling with extended flaps. This way, the brownies can be easily lifted out once cooled. |
| Cheesecake | Use a double layer of parchment paper to create a more robust lining and ensure there are no leaks when baking in a water bath. |
| Pound Cake | Grease the parchment paper thoroughly to maintain the cake’s integrity and prevent sticking, especially at the base. |
| Quick Bread | Add a layer of parchment paper widthwise to prevent sticking in taller pans, making removal easier. |
| Fruit Cake | Line the pan with both parchment paper and greaseproof paper to better handle the dense and moist texture of the cake. |
| Coffee Cake | Be extra meticulous with greasing, particularly in the folds and corners, to avoid any sticking due to its crumbly top. |
| Banana Bread | Add a strip of parchment paper in the center for easy lifting and to protect the loaf’s delicate structure. |
| Meatloaf | Use a reusable silicone liner for easy removal and to prevent sticking, as meatloaf tends to have more moisture than traditional loaf batters. |
| Focaccia Bread | Use an oiled parchment paper when pressing the dough into the pan to prevent sticking and create a crispy crust. |
| Savory Pies/Tarts | For savory pies and tarts, use a double layer of parchment paper to prevent any leaks or spills during baking. |
FAQs – Line A Loaf Pan
Do I need to grease the pan before adding parchment paper?
Yes, it’s recommended to lightly grease the pan before placing the parchment paper. This helps the paper stick to the pan and prevents it from moving around when you pour in the batter.
Can I reuse parchment paper for multiple bakes?
While parchment paper can be used more than once in some cases, it’s best to use a fresh sheet for each bake to ensure optimal non-stick performance and to maintain hygiene.
What if my parchment paper doesn’t fit the pan perfectly?
You can cut the parchment paper into pieces that fit the sides and bottom independently or use multiple layers to cover the entire pan. Ensure the pieces overlap to avoid batter seepage.
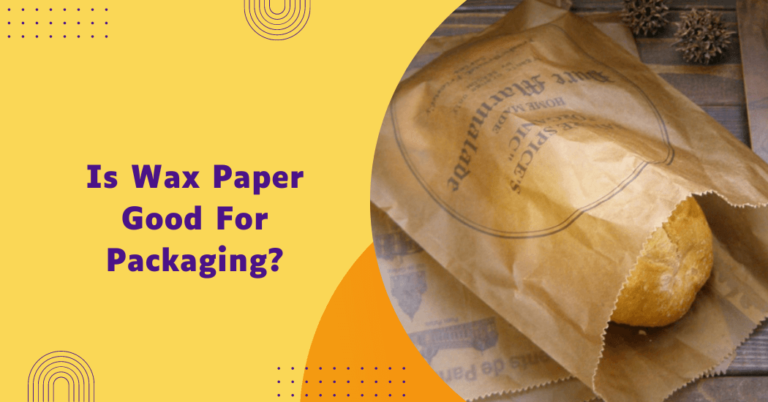
Can I use wax paper instead of parchment paper?
No, wax paper is not suitable for baking as it is not heat-resistant and can melt or catch fire in the oven. Always use parchment paper or a silicone baking mat.
Are there alternatives to parchment paper?
Yes, reusable silicone baking mats and liners are great alternatives to parchment paper. They are non-stick, eco-friendly and can be washed and reused multiple times.
What’s the best way to ensure the parchment paper stays in place while pouring the batter?
Lightly grease the pan or use clips to hold the parchment paper in place. You can also place pie weights or beans in the corners temporarily to keep them flat until the batter is added.
Final Words
Lining a loaf pan properly is a simple yet essential step in the baking process that ensures your baked goods come out perfectly every time.
By following the tips and avoiding common mistakes, you can create a non-stick surface that makes the removal of your baked items a breeze. Moreover, using special techniques tailored to specific recipes will help you achieve optimal results, whether you’re baking a dense fruit cake or a delicate cheesecake.
Remember, the right lining method not only prevents sticking but also contributes to even baking and a professional finish. So, invest a little extra time in lining your pans correctly.